• Start Here
  • About
  • Contact
  • Blogger Tribe
  • Work With Me

Gardening in High Heels

cultivate a beautiful life

February 16, 2017

On a Shoestring: DIY Air Plant Holder

February 16, 2017

I’m collaborating with Amy over at Amy and Angie for On A Shoestring: a series of posts to re-imagine how we dress, decorate, dine, and more all on a shoestring budget. We’re on a mission to show you that it doesn’t take a Rockefeller-sized closet (or house) and budget to have a good life!

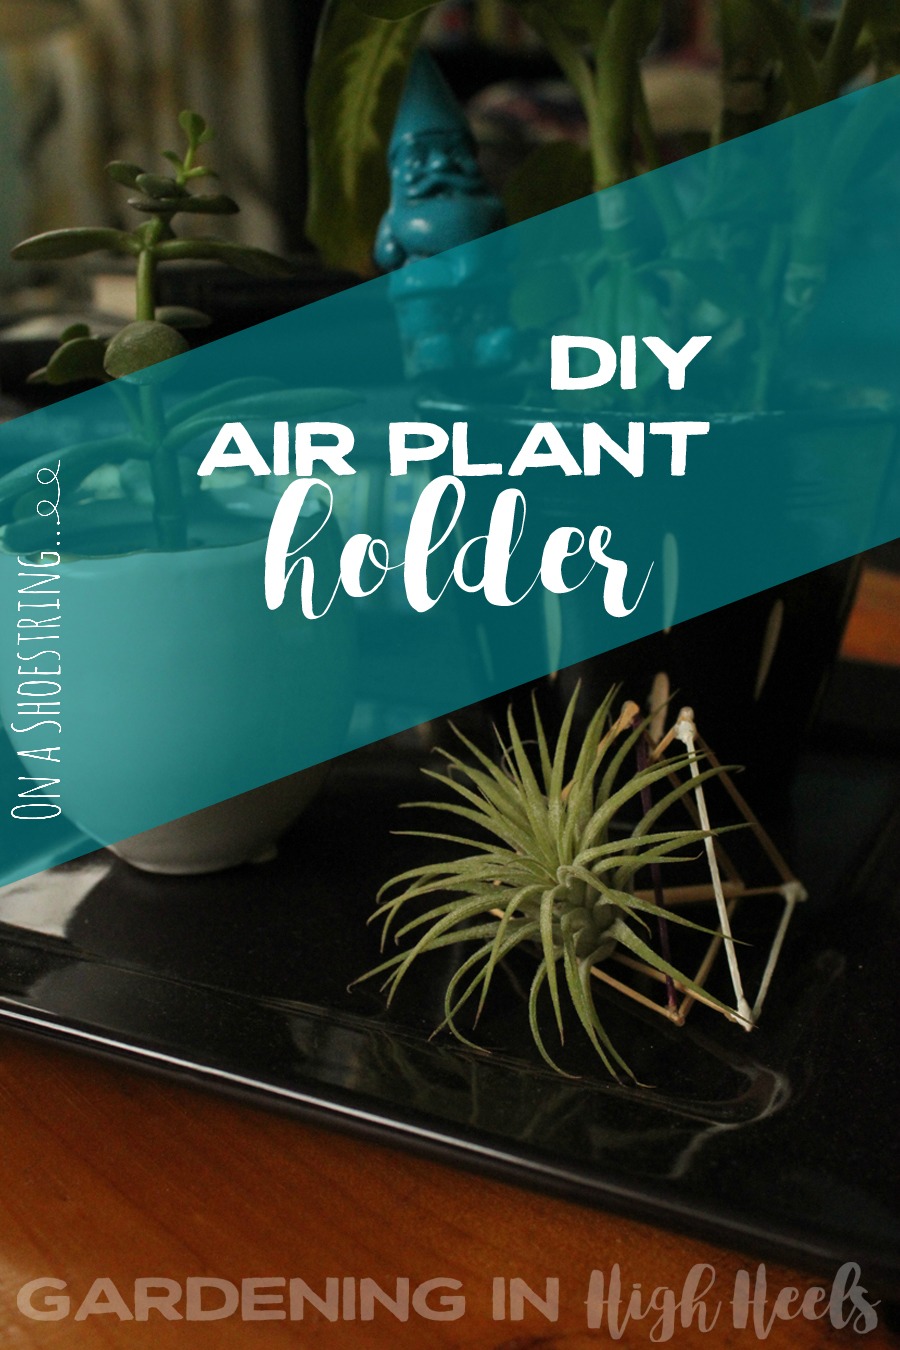
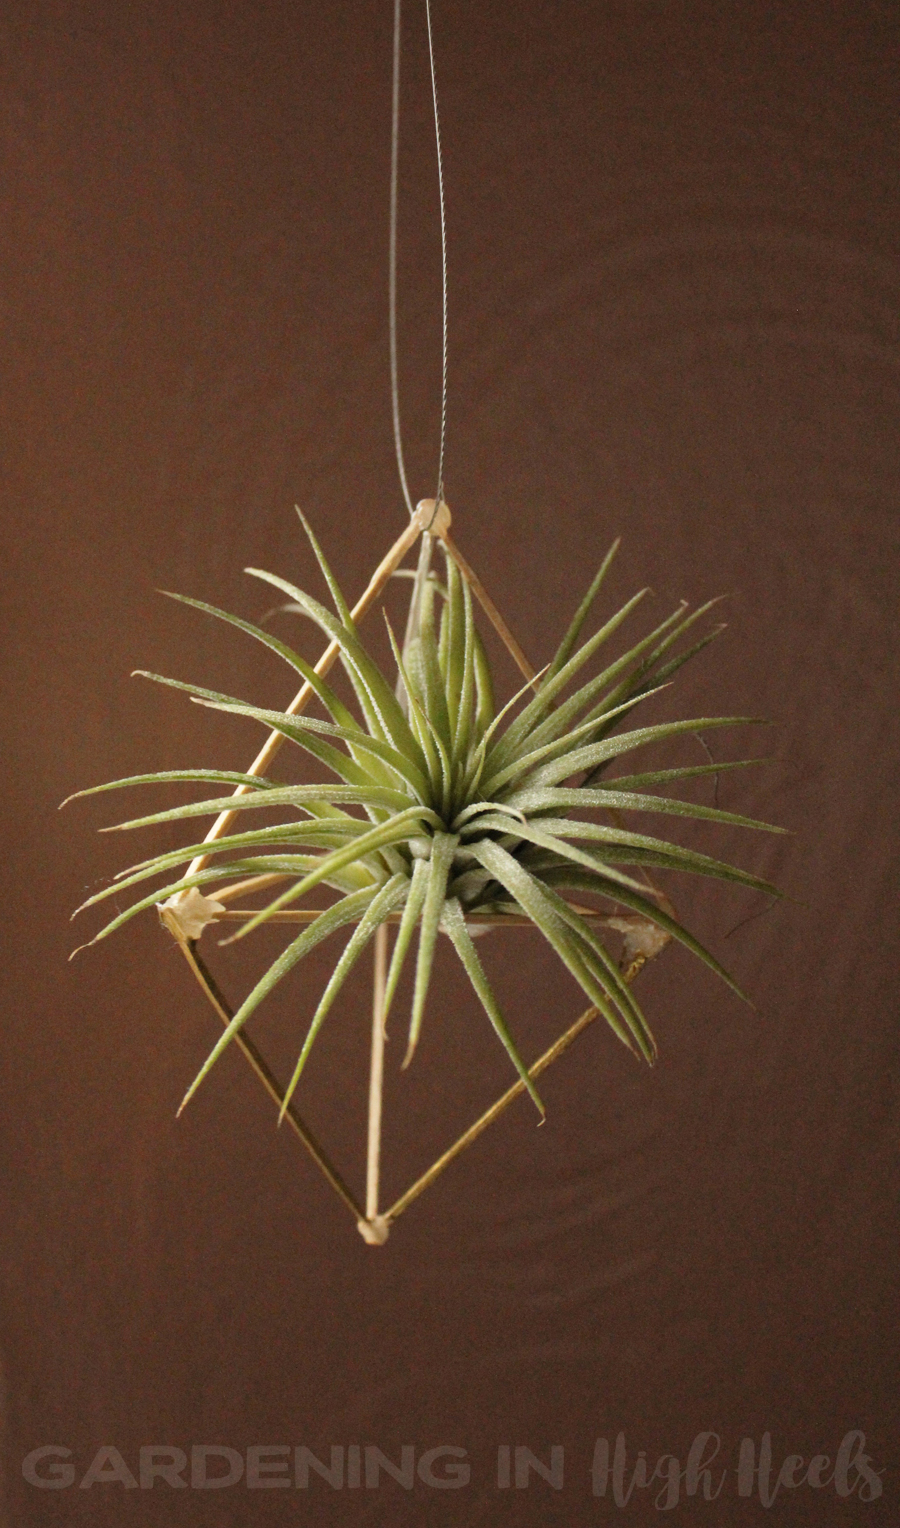
Today, Amy and I are DIYing decor. I’ve been seeing those cute geometric terrariums all over. You know the ones I’m talking about. They’re usually diamond-shaped, either have glass on their sides or they’re completely open, and typically in a brass/gold finish. Oh, and they’re like $25. For a table trinket.

No, thank you. I can make that instead (Famous Last Words of a Pinterest Project).

(Speaking of “I can make that instead,” you have to see this coat rack that Amy made for $10. She has an awesome tip for finding “free” wood!)

This DIY is truly a shoestring project. If you can break a penny, you can make this geometric air plant holder.

This air plant holder is so easy to make! It's just toothpicks, glue, and paint. It's an awesome, quick DIY!

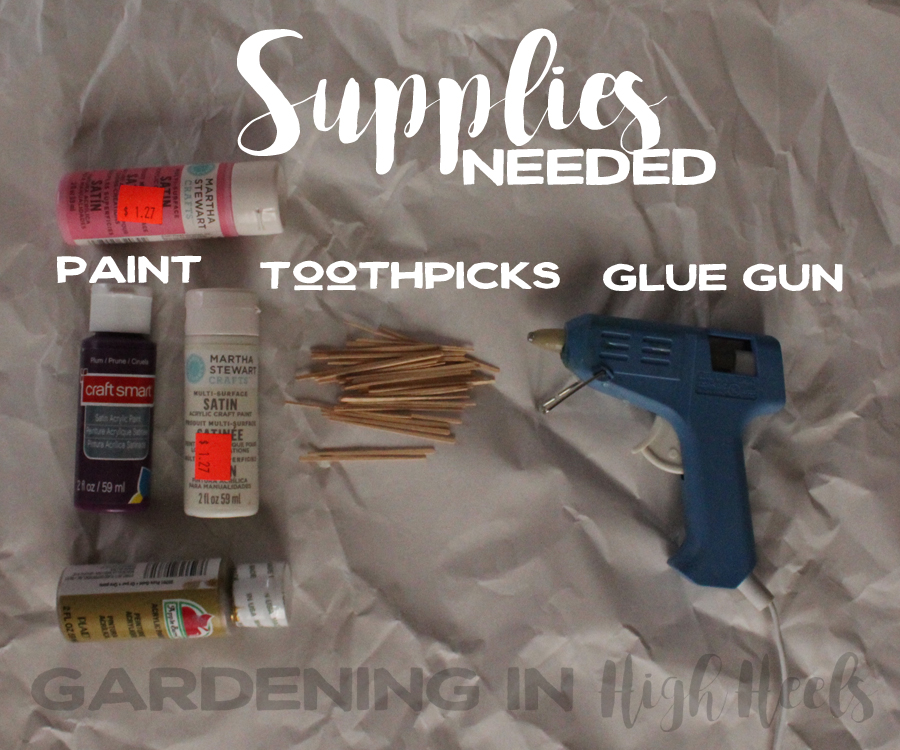
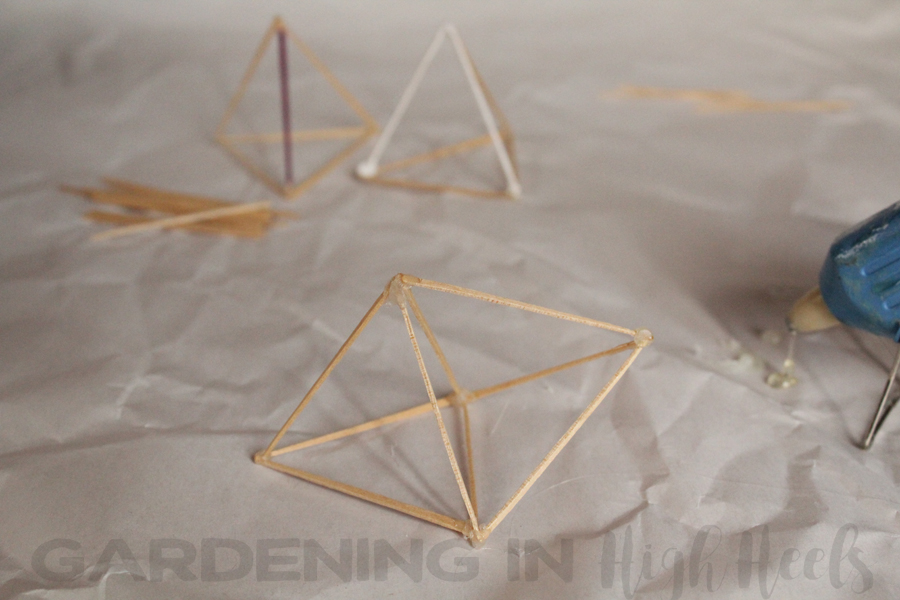
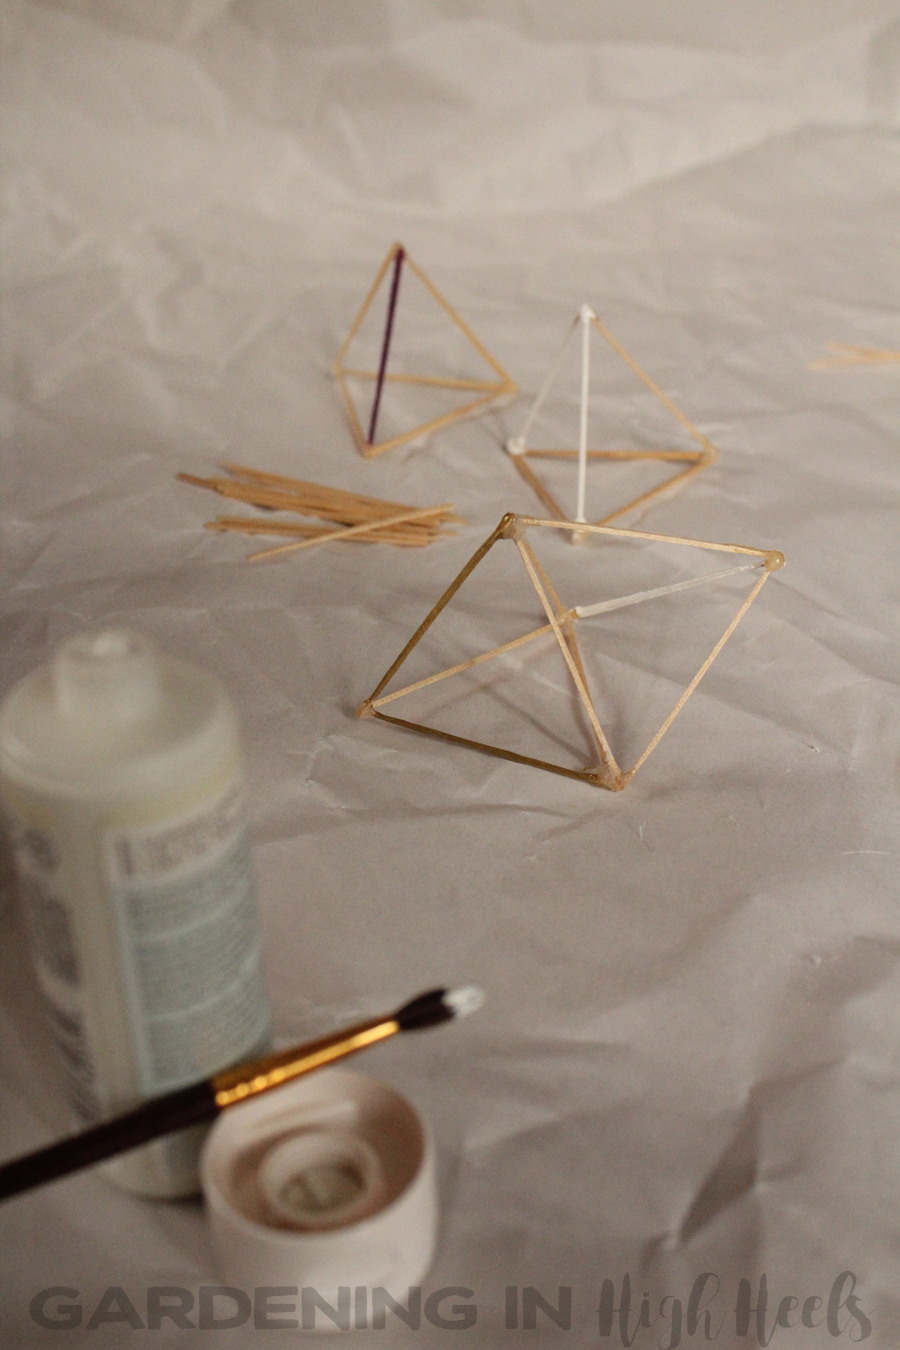
All you really need are toothpicks and a glue gun; I added some paint as well. Side note: I can’t wait for sunnier/less windy weather so I can spray paint again. The ventilation in my garage is less than ideal.

Bonus points if your Martha Stewart paint also came from Pat Catan’s clearance section.

This air plant holder is so easy to make! It's just toothpicks, glue, and paint. It's an awesome, quick DIY!

I started by laying out the toothpicks in the design I wanted. For the base, I placed the tiny ends against the fat ends to form a triangle. Next, I built up the pyramid with the fat ends on the bottom and the tiny ends coming to a point.

DIY toothpick air plant holder. So easy to make!

DIY toothpick air plant holder. So easy to make!

DIY toothpick air plant holder. So easy to make!

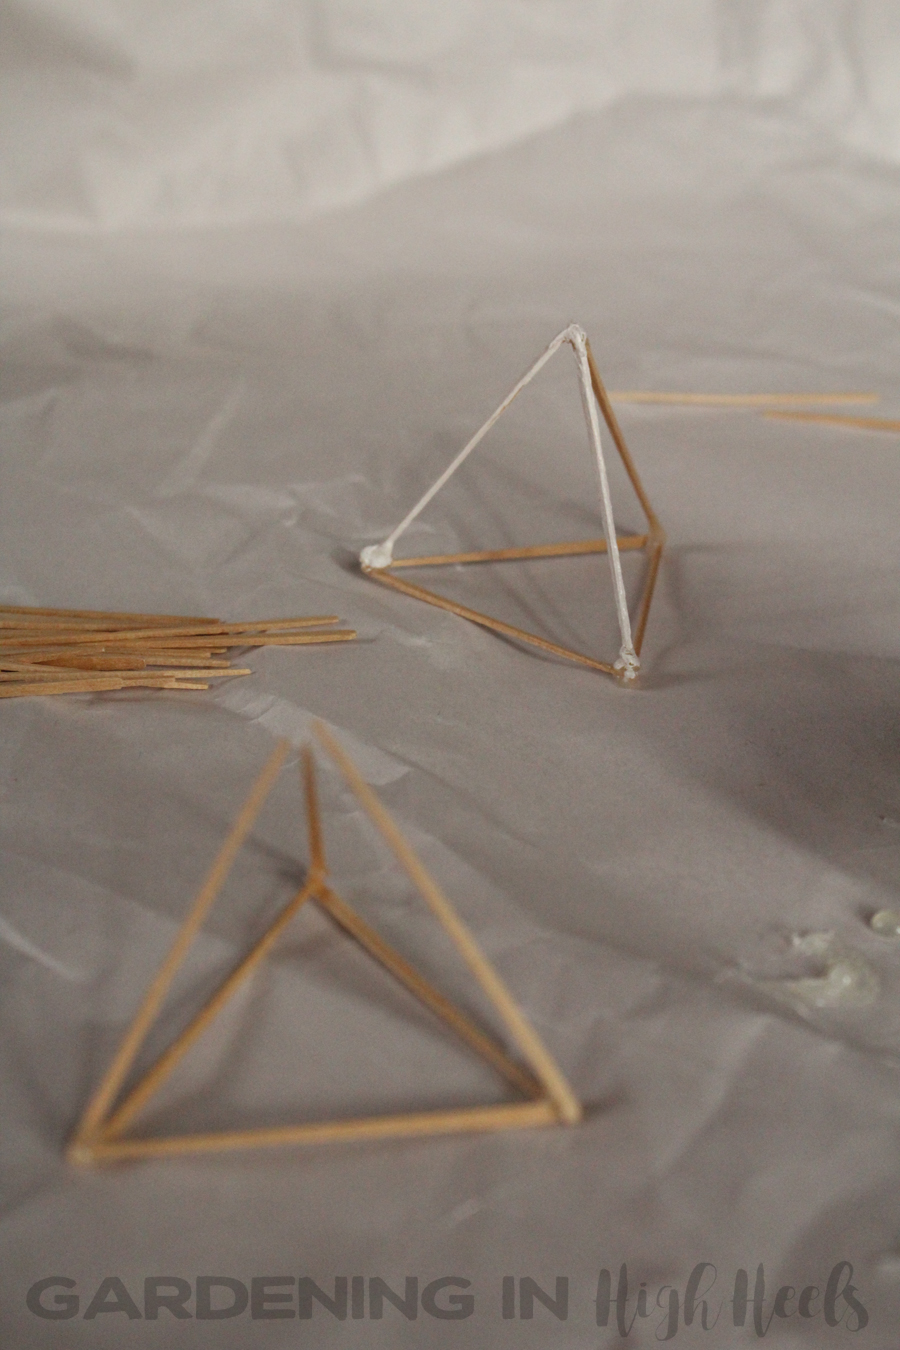
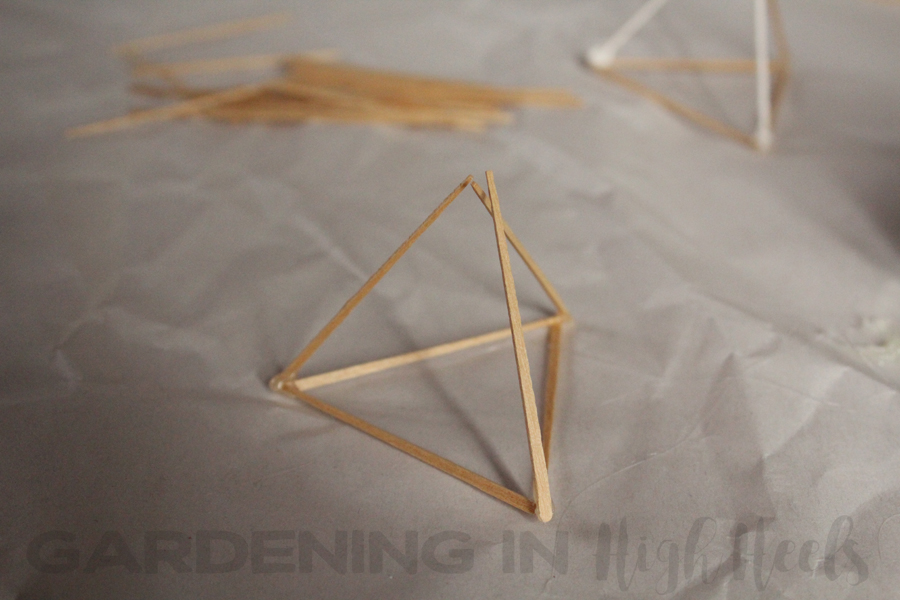
For a hanging planter, I added a second point to the other side. You can keep building it out to make it more gem-like – there’s no wrong or right way to do this.

DIY hanging air plant holder. So easy to make!

DIY toothpick air plant holder, hanging double pyramid style.

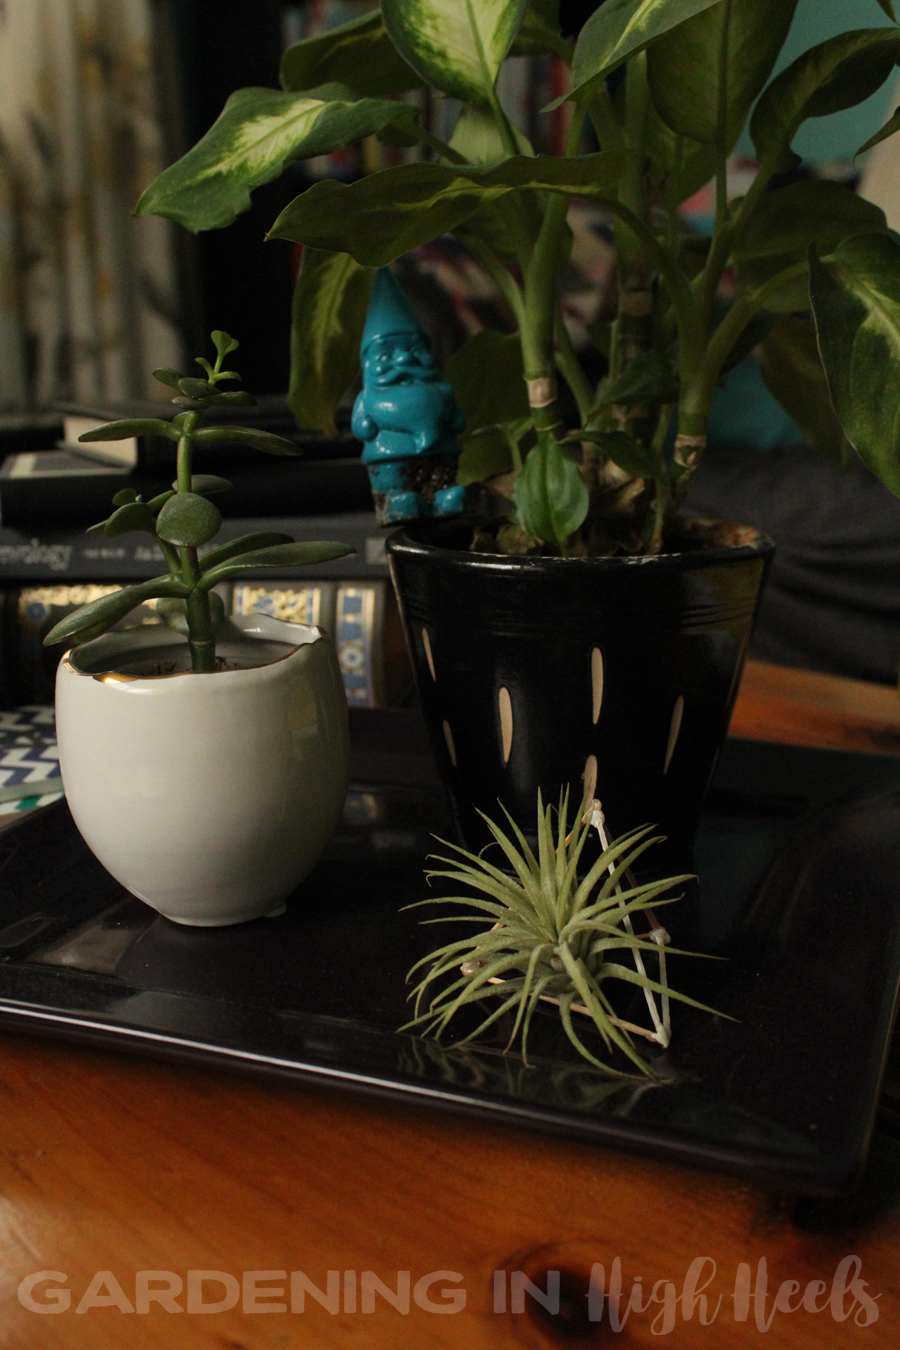
Then, I painted and styled with my air plant. You don’t even need to paint it, but I added a some color to one or two of the sides to carry out the geometric look.

DIY hanging air plant holder. So easy to make!

Here’s a warning about the glue: a little dab of glue is all you need – you’re just attaching toothpicks together, after all. They aren’t really that heavy-duty. My gluing got away from me just a bit. Painting the whole thing would cover that up. Since my glue gun tends to leak/drip, I just stuck the end of the toothpick in the drip and tried to wipe off the excess. Even if you failed at Glue Gunning 101, you and Lady Gaga can do this.

I feel like I cheated, it was that easy.

Double air plant holder DIY with toothpicks

DIY toothpick air plant holder. So easy to make!

Hanging air plant holder. It was a DIY homemade project using just toothpicks!

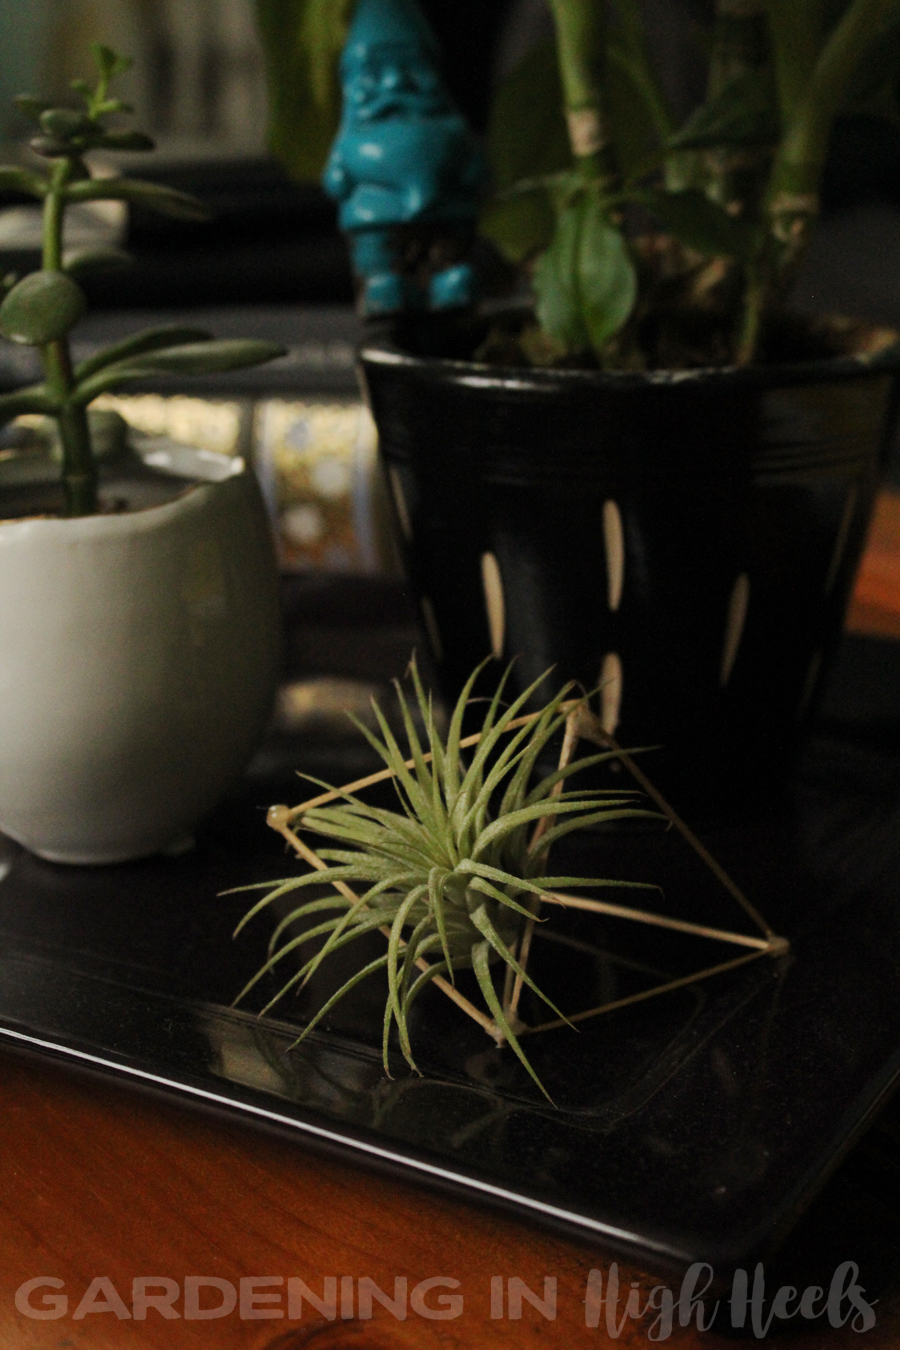
Caring for an air plant is super easy, too.

It really doesn’t need much attention. Because it gets its moisture from the air, though, it does need a little more TLC when the weather is dry.

When that happens, I soak my air plant in a cup of water for about an hour once a week. Place it in the water upside down and make sure the plant is submerged. When you remove it, dry it upside down. Water that sits in the plant can cause it to rot.

If it’s relatively humid, you can get away with spritzing it with a fine mist when it looks thirsty (mine right now needs to be watered – it’s looking a little ashy), but keep an eye out for warning signs.

How can you read the warning signs? Garden Therapy has a great how-to guide for reviving sad air plants. (I also have an entire Pinterest board dedicated to gardening and plants. I kill (almost) every succulent I bring into my house; I don’t know about you, but I need all the help I can get.

Do you have air plants? Where do they live?

Save

Spread the love:

  • Click to share on Twitter (Opens in new window)
  • Click to share on Facebook (Opens in new window)
  • Click to share on Google+ (Opens in new window)
  • Click to share on Pinterest (Opens in new window)
  • More
  • Click to share on LinkedIn (Opens in new window)
  • Click to share on Tumblr (Opens in new window)
  • Click to share on Pocket (Opens in new window)
  • Click to share on Reddit (Opens in new window)
  • Click to email this to a friend (Opens in new window)
  • Click to print (Opens in new window)

1 Comment · Labels: On A Shoestring Tagged: diy, home decor, on a shoestring

April 4, 2016

Sunday Lately, 66

April 4, 2016

Sunday Lately is a weekly link up brought to you by the Blogger Tribe. Link up and see what's been happening lately!Sunday Lately is a weekly linkup hosted by the Blogger Tribe (which is being fearlessly lead by Meghan, Nicole, Katy, and myself). We e-hang out every Sunday, sharing a small glimpse into the last week of life in our own worlds. We’d love if you could join us!
This week’s themes: Planning, Loving, Reading, Wishing, Feeling

Planning

So I painted my living room this weekend and I totally don’t love it. I’m planning to jazz it up with some new curtains and some art. I already custom-made something with leftover samples. I have one wall that looks dark and sad and I may just take a paintbrush to it and see what I come up with. The rest of the room doesn’t look like an adult lives there, why should my walls be super serious?

Loving

Aside from the fact that I feel like I’m living in an Eiffel 65 song, I really do like what I created as art. I used to have records hung on the wall, but I was worried about the paint peeling off it I put them back, so I’ll find another place for them.

Custom art made from leftover paint samples for the room. Perfectly coordinates!

Reading

All the Better Homes and Gardens. Ever since I was a kid, I loved magazines like that. I used to pour over them at my grandma’s house and dream about the lovely, airy, old-but-packed-with-charm house that I’d live in some day with my 500 dogs.

Wishing

Well it’s April 3 and Mother Nature decided she didn’t like that we were feeling happy and warm and she dumped some snow on us. And I’m wishing for the warm weather to come back!

Feeling

I’m feeling all the frustration about my living room. I affectionately referred to it before as “Mexican Restaurant Yellow” but it was warm and inviting. And all of the colors in my house are warm tones. I have no idea why I thought I could dump a fish tank room into it and it would magically work.

An InLinkz Link-up


What have you been up to lately?

Spread the love:

  • Click to share on Twitter (Opens in new window)
  • Click to share on Facebook (Opens in new window)
  • Click to share on Google+ (Opens in new window)
  • Click to share on Pinterest (Opens in new window)
  • More
  • Click to share on LinkedIn (Opens in new window)
  • Click to share on Tumblr (Opens in new window)
  • Click to share on Pocket (Opens in new window)
  • Click to share on Reddit (Opens in new window)
  • Click to email this to a friend (Opens in new window)
  • Click to print (Opens in new window)

2 Comments · Labels: Awkward & Awesome, Life, Right Now Tagged: Awesome, Awkward, home decor, link up, painting, sunday lately, weekly round up, weekly wrap up

September 23, 2015

DIY wine rack makeover

September 23, 2015

Another day, another chance for me to DIY and get spray paint all over myself.  I can’t get enough.  Case in point: these lamps and these picture frames.

It’s gotten to the point where I have figured out the prices and selections at my Pat Catan’s and Joann Fabrics stores is not as vast or easy on the wallet as at Home Depot.  Seriously.  If there is one store I avoid like the plague (next to IKEA for reasons why here) it’s Home Depot.  I always feel like a 6 year old in pigtails asking for help there.

But I found spray paint that was like…75% cheaper there than at a craft store.  So of course I had to do something with it…

80s wine rack makeover with spray paint. Love how this turned out! | Gardening In High Heels

I have this really old hand-me-down wine rack that my mom left when she moved out and it’s just not doing me any favors.

I think it was part of my parents’ dining set when they got married because the caning looks similar.  How she got this one piece and the rest of it stayed with my father, I’ll never know.  Mysteries of the family.  Either way, it’s mine now and I have stared at this long enough.

To the paint!  I used Rust-oleum Gold Metallic and Semi-Gloss Black spray paint to update this clunker.  Krylon is usually my go-to for spray paint, but I think Home Depot has a deal with Rust-oleum.

80s wine rack makeover with spray paint. Love how this turned out! | Gardening In High Heels

True story: growing up, I was not a fan of gold.  I only wore silver jewelry and I gravitated towards cooler tones.  Well, times have changed because I can’t get enough of gold accents now.  I mean, it’s a design element in the tagline in my header!  And black and gold just looks so chic together.

Please ignore the fact that I am from Pittsburgh and am proclaiming my love for the black/gold color combo.  I swear I’m not that stereotypical.

If you need proof that I cannot do anything without first making a huge mess, I give you my hand after spray painting the tiles on the top of the rack.

Spray paint blunders

The tiles look pretty, too.

Ceramic tiles spray painted with Rustoleum gold spray paint - perfect DIY update! | Gardening In High Heels

I’m so happy with the outcome of this DIY makeover.  The best thing about spray paint is how easy it is to completely change the look of something.  I’m at the point where I want to paint anything that isn’t nailed down (and maybe some things that are.)

80s wine rack makeover with spray paint. Love how this turned out! | Gardening In High Heels

80s wine rack makeover with spray paint. Love the gold and black combo! | Gardening In High Heels

80s wine rack makeover with spray paint. Love the gold and black combo! | Gardening In High Heels  80s wine rack makeover with spray paint. Love the gold and black combo! | Gardening In High Heels

Keep wine corks in a latern from IKEA! | Gardening In High Heels

I thought I’d be super-cute and paint an old DVD/CD tower to match.  It didn’t have nearly as much luck.  I thought I grabbed the paint+primer kind that can cling to a water buffalo, but either this laminate was no match for the paint or I didn’t get the right kind.

Spray paint fails - you get chips if you don't use the right kind or prep your surfaces!

I tried to put the shelves in and got scratches galore.  Fail all over.  So this has been sitting on my back porch while I get the nerve to take it up to the curb for trash day.  I hate giving up on a project, don’t you?

80s wine rack makeover with spray paint. Love the gold and black combo! | Gardening In High Heels

What have you DIY-ed recently?

Spread the love:

  • Click to share on Twitter (Opens in new window)
  • Click to share on Facebook (Opens in new window)
  • Click to share on Google+ (Opens in new window)
  • Click to share on Pinterest (Opens in new window)
  • More
  • Click to share on LinkedIn (Opens in new window)
  • Click to share on Tumblr (Opens in new window)
  • Click to share on Pocket (Opens in new window)
  • Click to share on Reddit (Opens in new window)
  • Click to email this to a friend (Opens in new window)
  • Click to print (Opens in new window)

3 Comments · Labels: How To Tagged: diy, furniture, home decor, makeover, rustoleum, spray paint

May 20, 2015

DIY spray paint frames

May 20, 2015

There are few things that I can’t do with spray paint.  I’ve updated dining room furniture.  I’ve make over hand-me-down hand-me-down lamps (or is that lamps twice removed?)  Either way, now I used spray paint to update some picture frames.  It’s a total cheap-to-chic makeover.  Today’s theme for Blogger, May I is share something you created, so I’m sharing my easy frame makeover.

Okay, all together now… How easy is it?

Easy and cheap frame makeover with spray paint!

Well, I did it in a few hours on Sunday.

I had these cute kitchen printables from The Happy Housie hanging out for a while; they were just patiently waiting until I got myself to a craft store.  I knew frames would turn into a heftier check since they’re surprisingly expensive.  (Why?  They’re just some wood/metal and glass!)  And I needed five of them.

I found these frames at Pat Catan’s for $1.50 each.  I also bought a can of spray paint.

Frames before their coat of spray paint. Be sure to use paint and primer in one to ensure a smooth coat that lasts!

I love how I accidentally totally intentionally framed out “Let’s cut through the confusion” on the newspaper.  That’s what I’m doing today.  Cutting through the spray-paint-using confusion.

Frames getting a pretty coat of spray paint. Be sure to use paint and primer in one to ensure a smooth coat that lasts!

For about $15, I have 5 brand new frames.

That’s about the price of one frame at a normal store or 2.5 frames at a discount store.  And a discount store frames are sometimes a little…..well, not chic and cute like these.

DIY frame makeover and cute printables. Be sure to use paint and primer in one to ensure a smooth coat that lasts!

DIY frame makeover and cute printables. Be sure to use paint and primer in one to ensure a smooth coat that lasts!

Don’t they look so much better in satin black than glossy hot pink?

The number one spray painting trick that I follow is to look for spray paint and primer all in one.  I know people recommend to sand things down a little to get the surface rough, but I didn’t want scratches to be apparent on the frames.  The primer ensures it’s a smooth application and stays on there.  No chips or just plain not sticking for these frames.

DIY frame makeover and cute printables. Be sure to use paint and primer in one to ensure a smooth coat that lasts!

DIY frame makeover and cute printables. Be sure to use paint and primer in one to ensure a smooth coat that lasts!

DIY frame makeover and cute printables. Be sure to use paint and primer in one to ensure a smooth coat that lasts!

DIY frame makeover and cute printables. Be sure to use paint and primer in one to ensure a smooth coat that lasts!

I love how these add a little something to my kitchen quirky and cute to my kitchen.  The frames also look instantly classier in satin black than hot pink.  Blue pictures with a black frame?  That’s chic, yo.

What have you made recently? Let’s hear about it!

An InLinkz Link-up


Spread the love:

  • Click to share on Twitter (Opens in new window)
  • Click to share on Facebook (Opens in new window)
  • Click to share on Google+ (Opens in new window)
  • Click to share on Pinterest (Opens in new window)
  • More
  • Click to share on LinkedIn (Opens in new window)
  • Click to share on Tumblr (Opens in new window)
  • Click to share on Pocket (Opens in new window)
  • Click to share on Reddit (Opens in new window)
  • Click to email this to a friend (Opens in new window)
  • Click to print (Opens in new window)

4 Comments · Labels: Blogger May I, How To Tagged: blogger may i, decor, diy, frames, home decor, spray paint

March 27, 2015

Easy lamp DIY makeover in five steps

March 27, 2015

In case you haven’t heard, I’ve been doing a lot of cleaning.  Most of that means taking things that are no longer working and getting rid of them.  But I have a bad disease of saying, “I can make something with this!” and hanging on to things for ages.

For example: I thought I was going to do some awesome project with empty beer and wine bottles.  So I started to save them.  Now it’s a habit and I’m like, “Woo, I have a six pack….of empty bottles…”  Maybe I can sell them on Etsy to people with more follow-through.

Anyway, when I saw these lamps, I saw DIY project written all over them.  For $10, I have all new lamps.  How did I do it?  Simple: spray paint.  Next to Mod Podge, it’s my favorite craft supply.

Super simple lamp makeover using spray paint. New lamps in under an hour for about $10!

Let me tell you how I took these lamps from beat up and dated to shiny and new.

Step 1: Decide you can make something out of this.

Spray paint is my friend.  I love spray paint.  I took a can of spray paint to old, beat down chairs and they now look decent enough to be used in my dining room.  But that’s beside the point.

Super simple lamp makeover using spray paint. New lamps in under an hour for about $10! Spray paint updates anything and it's virtually mistake-proof!

These lamps were in my Grammy’s apartment (I believe) and somehow ended up in my father’s basement.  They were used for a while and eventually replaced.  They still worked, so we didn’t get rid of them.

And they still work years later!  I’d love to redo the wiring, but that’s another DIY for another day.

Step 2: Decide what you want them to look like.

I was going for a mercury glass effect thanks to the brilliant mind of Jonathan.  I went to my second favorite craft place (JoAnn Fabrics) and found silver spray paint and spray paint that makes a webbing effect.

Dude, it comes out just like Spiderman.  I felt so cool.

Spray paint is the best thing when DIY-ing. I love Rustoleum because it covers everything and lasts for ages (or until you spray paint again)!

Spray paint is the best thing when DIYing. I love Rustoleum because it covers everything and lasts for ages (or until you spray paint again)!

Step 3: Take it to the paint!

Be sure to tape off all parts that shouldn’t get painted (wires, the top bulb receiver thingy).  I don’t care how careful you think you’ll be, you will get paint all over.  I’m a pretty good DIY-er, but my best talent is making a mess.


I did two coats of silver and a coat of the black webbing.  I’m slightly disappointed the black didn’t show up better with the webbing paint, but the ridges make it difficult to see.

I almost stopped at painting them just plain silver.  It looks so sleek, but it also kind of looks like a soup can.  I have a hodge-podge of furniture right now, but collection-center chic isn’t what I’m going for.  So I added the webbing paint on top to try to give it some texture, dimension, and those little crackles in the mercury glass.

Super simple lamp makeover using spray paint. New lamps in under an hour for about $10! Spray paint updates anything and it's virtually mistake-proof!

Super simple lamp makeover using spray paint. New lamps in under an hour for about $10! Spray paint updates anything and it's virtually mistake-proof!
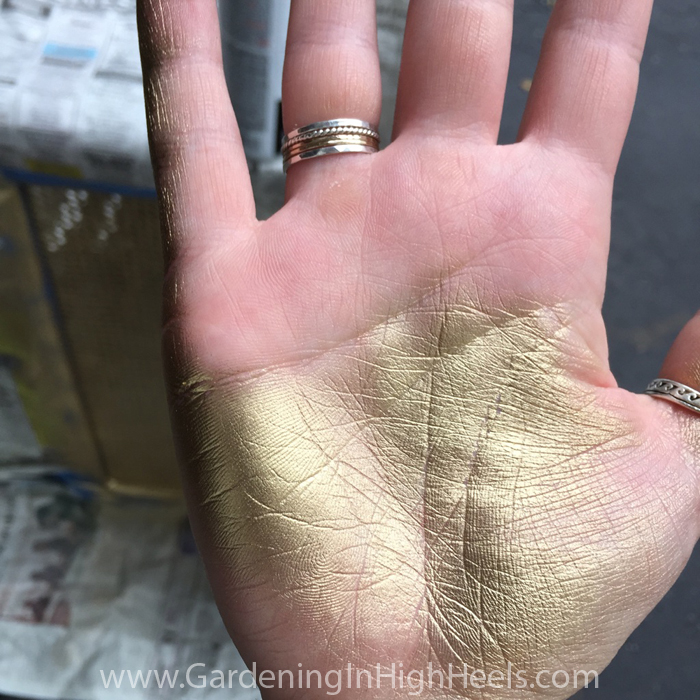
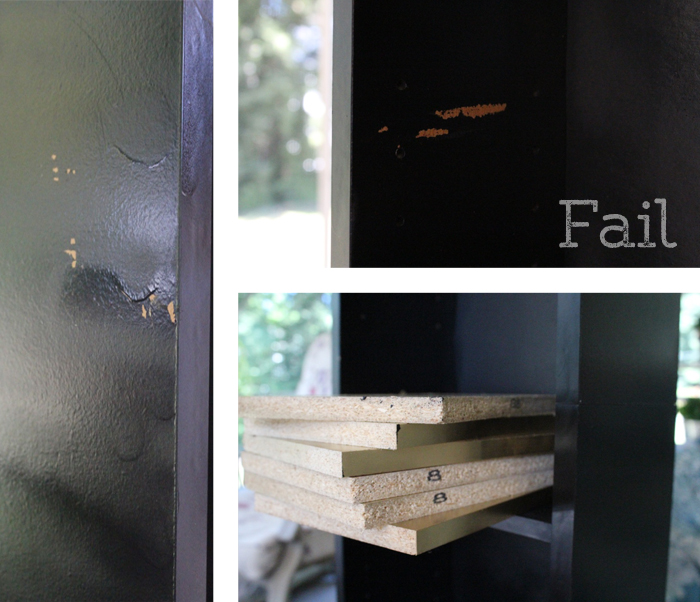
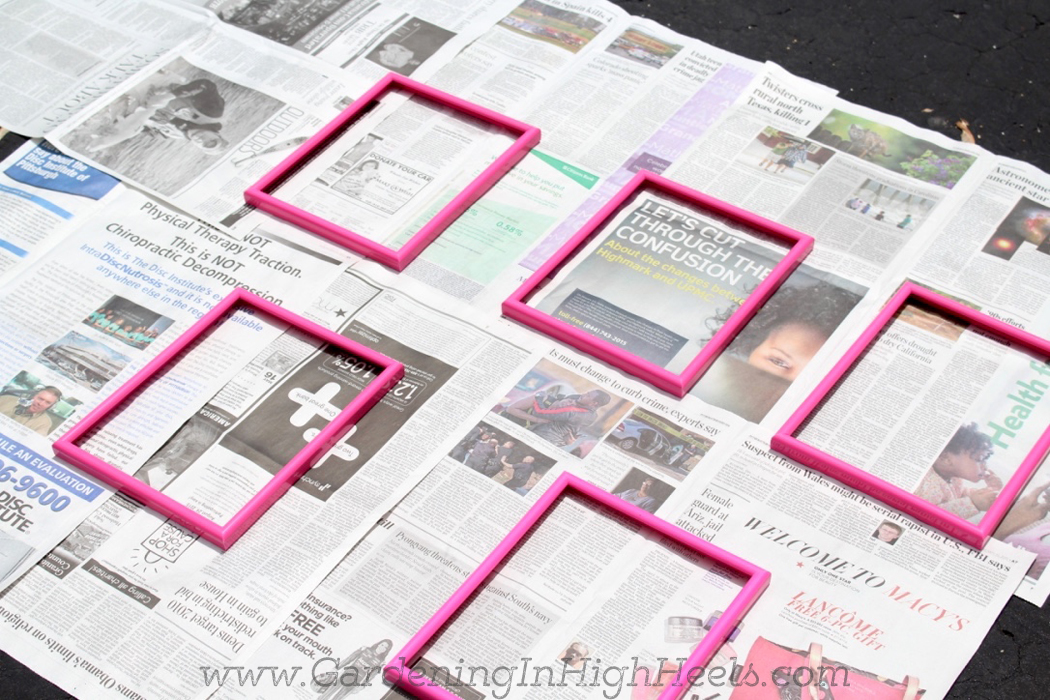
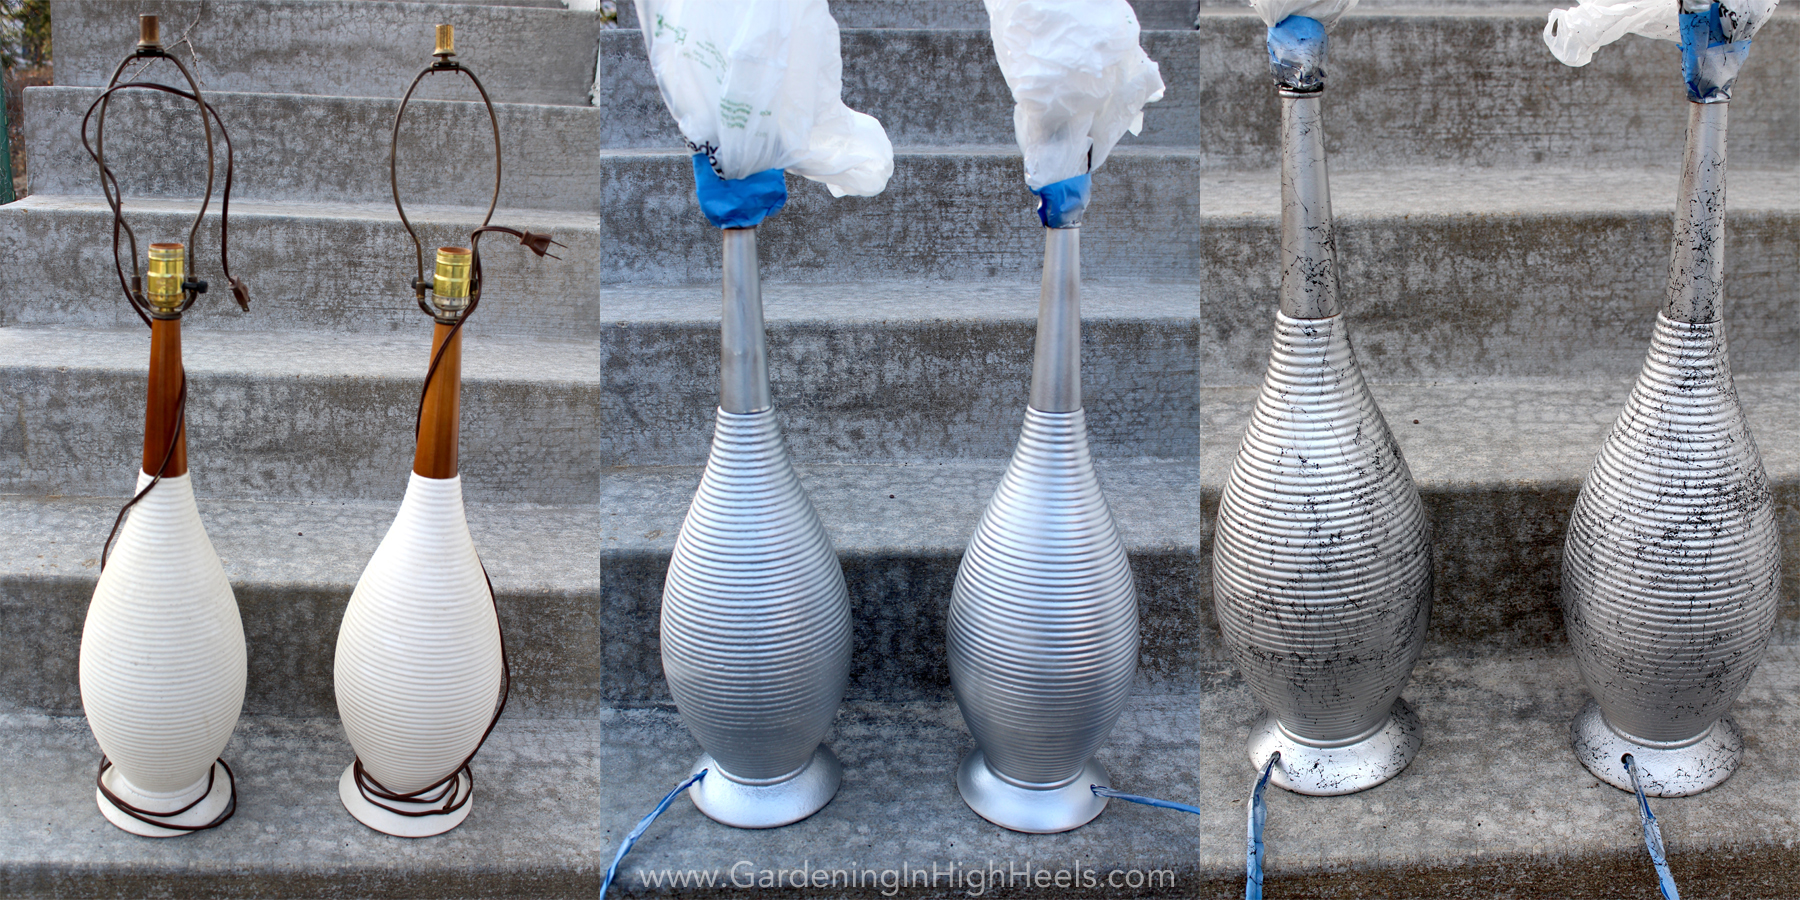
Step 4: Have painters’ remorse.

I checked Instagram and got a comment from a friend saying that she’d buy these from me if the wooden part was painted gold and the base stayed the same.  And I got painters’ remorse.  That would have looked awesome.  I was seriously upset I didn’t do that.

But then I remembered the white ceramic part is old and pretty beat up.  Instagram just made them look pretty and white.

Plus, I can always paint over them again if I want to.

Step 5: Find somewhere to put them and revel in your DIY powers.

These guys hung out in my garage for a week because I wasn’t sure if I was going to add another layer of webbing, either black or gold.  I still could.  But once you decide, Okay, that’s enough paint, now you need to figure out where to put them.

Super simple lamp makeover using spray paint. New lamps in under an hour for about $10!

The lamp shades that were also found in the basement are a little tooooo tall, but hey, they’re free.  And the lamp base itself is pretty big, so I guess it balances out.

These are going to hang out in my bedroom and my living room until I have my office in order because I originally had the intention of using them as lighting in my office.

Super simple lamp makeover using spray paint. New lamps in under an hour for about $10! Spray paint updates anything and it's virtually mistake-proof!

There you have it.  Five steps to a DIY lamp (or anything) makeover.  I cannot tell you how much I love taking something old that someone would say isn’t worth keeping and turning it into something shiny and new and pretty again.

Have you done any projects recently?  What did you DIY?

Spread the love:

  • Click to share on Twitter (Opens in new window)
  • Click to share on Facebook (Opens in new window)
  • Click to share on Google+ (Opens in new window)
  • Click to share on Pinterest (Opens in new window)
  • More
  • Click to share on LinkedIn (Opens in new window)
  • Click to share on Tumblr (Opens in new window)
  • Click to share on Pocket (Opens in new window)
  • Click to share on Reddit (Opens in new window)
  • Click to email this to a friend (Opens in new window)
  • Click to print (Opens in new window)

7 Comments · Labels: Five Things, How To Tagged: diy, home decor, home improvement, homemade, how to, lamp, makeover, projects, rustoleum, spray paint

Who’s Angelica?

Life Un-styled Blogger, Gardener, Shoe Lover..among other things

I'm here to encourage and empower you to grow where you're planted and embrace the weeds that sometimes pop up. I'll share inspiration, products I like (and you may too), and stories from the garden.

Gardening In High Heels is for badass babes who aren’t afraid to get a little messy. Want to learn more? Start here.
           

Dig Up Something Good

Cultivate a beautiful life with emails directly from me!

Latergrams

Tweet, Tweet

My Tweets

Other Flowers in the Garden

Sunday Lately with Blogger Tribe
#BeABetterBlogger

Disclosure Policy

Just so we can keep everything cool, I wanted to share a few notes on how my blog operates.

I occasionally receive products and/or payment from companies to review and/or give away. Sponsored posts and giveaways will be noted as such.

All images and content are property of myself and Gardening in High Heels unless otherwise stated. You may not use my images or content without express written permission.

See the full policy here.

Dig Up Something Good

Let’s Play


People Really Dug These

  • Good for her, not for me.

We Belong in the Garden Together

Theme by 17th Avenue · Powered by WordPress & Genesis

loading Cancel
Post was not sent - check your email addresses!
Email check failed, please try again
Sorry, your blog cannot share posts by email.