• Start Here
  • About
  • Contact
  • Blogger Tribe
  • Work With Me

Gardening in High Heels

cultivate a beautiful life

May 11, 2015

How to: use manifesting and affirmations

May 11, 2015

Today’s Blogger, May I prompt is what are you learning?  It’s the perfect time to share this post.  I love Britt Reints, Emily Levenson, all the other women in the Propelle community who are believers in manifesting their dreams through intentions and affirmations.

I am a little skeptical.

Manifesting is an interesting idea that's getting a lot of attention in empowerment groups. Here are a few resources to learn about manifesting your dreams.

I am learning about it, though, and it’s fascinating.  My mom is a big believer in listening to your intuition; I am getting there, but I’m still having a hard time recognizing what I’m consciously thinking and what I’m hearing “the universe” say to me.  That said, I usually am pretty good at following my gut [insert joke about needing to tone my abs here].

A little over a year ago, I did Emily’s Project Miracles and had a great experience.  Based on Melody Beattie’s book, you write down your goals and what you want to and in 4o days, poof, it should be there.

It did take some time to get into the groove; I had a hard time trying to figure out where it was all going.  It was about a year after I did it that I finally saw some of the miracles I wanted to manifest take place.  I’m so impatient that I expect to work out once and see results, so manifesting and positive affirmations are as much an exercise in patience as they are in faith for me.

If you’re into manifesting and using affirmations, here are a few things that I’ve found to be helpful.

One is setting the intention.  I received an email from the Propelle ladies that had this specific intention: I am open to receive.

That’s perfect.  How can you manifest anything if you aren’t open to the experience?  If you aren’t sure if you’re listening to your gut, tell yourself that you’re open to receive and just wait to see what vibe you get.

Second, believe what you’re manifesting is possible.  In another Propelle email, they wrote this:

Manifestation is not only about envisioning what you want to happen happening but it’s also believing it’s possible and that you’re capable and worthy.

There’s also a fun letter to the universe you can use.

Three: get specific.  That’s another theme throughout my research that I’ve noticed.  Propelle recommends getting very specific.  Marie Forleo talks about it in conjunction with a gratitude practice.  My mom would always tell me that, too.  Tell the universe very clearly what you want.

How’s this for specific: tapping for $50,000.

Lastly, meditation.  It helps to have a clear headspace when you are manifesting.  I love this practical guide from A Daring Adventure.  Britt Reints also has many helpful affirmations if you sign up for her newsletter!

Everyone says to “sit with it.”  This is something I hear all the time, most recently from a Google Hangout that Emily Cassel hosted.

I’ve come to learn that I need help just marinating in things.  I definitely trust in feeling out a gut reaction, but sometimes I have a hard time knowing what the universe is saying to me and what am I consciously thinking.

If you’re looking for more information about manifesting, here’s a seven-step process from Kate Northrup.  And I’d be remiss if I didn’t mention Gretchen Rubin, too!

What are you learning?  Would you ever try manifesting?

An InLinkz Link-up


Need the prompts for the Blogger, May I challenge? Gotcha covered. Want to use your own prompts? No problem! Just grab a button to show that you’re linking up with myself, Katy, and Meghan. Oh, and use #BloggerMayI on Twitter/Instagram to keep the fun going even after you hit Publish!

Spread the love:

  • Click to share on Twitter (Opens in new window)
  • Click to share on Facebook (Opens in new window)
  • Click to share on Google+ (Opens in new window)
  • Click to share on Pinterest (Opens in new window)
  • More
  • Click to share on LinkedIn (Opens in new window)
  • Click to share on Tumblr (Opens in new window)
  • Click to share on Pocket (Opens in new window)
  • Click to share on Reddit (Opens in new window)
  • Click to email this to a friend (Opens in new window)
  • Click to print (Opens in new window)

2 Comments · Labels: Blogger May I, How To, Motivation Tagged: affirmations, blogger may i, britt reints, emily cassel, emily levenson, manifesting, propelle

April 3, 2015

Bunny light bulb redo

April 3, 2015

Last year, I shared two projects for making decorations with light bulbs.  I had penguins and Grinches for Christmas and bunnies for Easter.  I’d love to make ducks, but I’m still trying to figure out the logistics of that.

If I do, y’all will be the first to know.

Super easy Easter craft making bunnies from old light bulbs! #upcycle #reuse #easter

Side note: I’m from Pittsburgh, I fully understand that my kind is supposed to say “yinz.”  I just can’t, so you get “y’all.”

Light bulb bunnies are a ridiculously easy craft and (I have no way to verify this as I don’t have children of my own) fun for kids!  Just keep an eye on them and make sure they don’t drop a poor light bulb bunny.

Super easy Easter craft making bunnies from old light bulbs! #upcycle #reuse #easter

What I love about this project is that the materials are so easy to find.

  • Old light bulbs (I don’t even bother to take the guts out, so no sharp pieces)
  • Red, white, and black paint
  • A Sharpie
  • Card stock or heavy paper
  • Cotton balls
  • Brushes, toilet paper rolls (to prop up drying bulbs), and a plate for paint mixing
  • Hot glue gun or other adhesive stuff

I’m guessing you have about 100% of these items in your house right now.

Super easy Easter craft making bunnies from old light bulbs! #upcycle #reuse #easter

Super easy Easter craft making bunnies from old light bulbs! #upcycle #reuse #easterSuper easy Easter craft making bunnies from old light bulbs! #upcycle #reuse #easterSuper easy Easter craft making bunnies from old light bulbs! #upcycle #reuse #easter

Are you ready to make your own?  Click here to see how I did it!

I’m off to boil some eggs for dying.  Pro tip: save the water!  Plants love the calcium that comes out of the shells!

What are your favorite Easter crafts?

Spread the love:

  • Click to share on Twitter (Opens in new window)
  • Click to share on Facebook (Opens in new window)
  • Click to share on Google+ (Opens in new window)
  • Click to share on Pinterest (Opens in new window)
  • More
  • Click to share on LinkedIn (Opens in new window)
  • Click to share on Tumblr (Opens in new window)
  • Click to share on Pocket (Opens in new window)
  • Click to share on Reddit (Opens in new window)
  • Click to email this to a friend (Opens in new window)
  • Click to print (Opens in new window)

1 Comment · Labels: How To Tagged: bunnies, crafts, diy, easter, light bulbs, spring, springtime

March 30, 2015

Spring clean: makeup organization

March 30, 2015

A few weeks ago, I spent ages (okay, a few hours) rounding up all of my makeup and sorting through it.  I have a problem hoarding all the makeup seeing and storing what I have.  I’ve been trying to do #365DaysofEmpties to lighten up my collection, but it’s still raging out of control, so I had to find a better way to sort and store things.

Easy secrets to sort through and organize makeup for a spring clean! Use these tips to organize and store your makeup using things you probably already have around the house.

To get rid of what I had:

It pained me so much, but I asked myself these five questions.  If it was old, I didn’t like it, and/or just hanging out for the sole purpose of hanging out, I did my best to get rid of it.

How old is it?

If you’re unsure if something is still good, check out this post to know when something is telling you, Hey, I expired.  Or just do a search on Pinterest for “makeup expiration;” all of the recommendations are mostly the same.

Do I have this already in a similar shade?

If so, the older one or the one I like least has to go!  If it’s a backup for a product I love and use, though, it’s definitely staying.

Could I give it to someone else?

If it’s a new product (or mostly new and has been cleaned properly) and I can give it to someone who will use it, I will!  Anyone want to do a blog makeup swap?

Is it hanging around because I don’t use it and I feel bad throwing something away?

I’m so guilty of this.  I can’t throw away something if it’s still usable, even if I don’t use it.

Is it half-finished and I just have to make a point to use the rest of it up?

Guilty of this, too.  I can’t throw something away if it’s usable AND I still have product left to use.

To store what I have left:

What will allow me to use this the most?

I’m so guilty of “Out of sight, out of mind.”  If I don’t see it, I’ll forget about it.  So I pulled out a few of my favorite lip sticks/glosses and have them in their own holder outside of the sorted boxes of lip balm, stick, stain, and gloss.  I just pick the color I want for the day and go without having to paw through endless boxes (or yesterday’s work bag).  Then I’ll swap/rotate out weekly to start playing favorite with others and as the seasons change.

Can I group/store this with similar products?

I have a Quirky Zen Cosmetics from Jonathan that I love and was going to use for eyeliner, but I know liquid eyeliner should be stored on its side and I have pots of gel liner that wouldn’t fit.  It doesn’t make sense to have eyeliner stored in different areas, so I use an empty Birchbox box to corral everything and the brushes stay in the Makeup Zen nice and neat.

Quirky Zen Cosmetics for holding brushes, eyeliner, lip liner, anything!

Group similar kinds of makeup together to make it easier to store. You use it more, too, because you can see it all!

Use what will work for you

Maybe you have an extensive collection and need more drawers/containers that I need.  Maybe you only need a three-drawer container with one drawer for eyes, another for lips, and a final for face (at one time I could fit everything into a small storage tower like that.  Oh the days).

Use these tips to organize and store your makeup using things you probably already have around the house!

Use what works for you.  If a large organization project makes you shake, don’t do it!  If you need clear drawers instead of closed boxes, go find them!

Try other sections of Target

I found a clear desk/mail sorter in the clearance stationery/desk supplies section.  I was going to try using it for brushes and corralling small items.  That didn’t work, so I figured out something else to do with it.

Store eye palettes in an office organizer so you can see them all and easily reach for them.

But my point here is to think in terms of other sections of the store.  If the makeup caddies aren’t what you’re looking for, maybe another organizational section will have something you like.  Or try a totally different store, like Marshall’s or even Staples.  There’s nothing a little spray paint can’t make prettier!

Take unused items out of the collection

Weed out the new items that are waiting to get opened (like mascara, lip gloss, etc) to lighten up what is in the visible places.  It also helps me to use up what is left in an old container before I move on to something new.  I have a bad habit of wanting to use something the second I buy it.  Even toothpaste.  I’m like, “Yes, I want to try that Wintergreen flavor now!”

Store extra makeup items in boxes that can easily stack away in a closet and you know where it is when you need it in the morning.

So by sorting unopened makeup into groups for eyes, lips, and face, I can take out exactly what I need (new blush? mascara?) without having to paw through everything and make a bigger mess.

Also, join me for the #LipStockChallenge – a different lipstick every day until I run out.  Post your photos with the hashtag to play along!

Those are my secrets for taming my makeup collection.  What are yours?

Spread the love:

  • Click to share on Twitter (Opens in new window)
  • Click to share on Facebook (Opens in new window)
  • Click to share on Google+ (Opens in new window)
  • Click to share on Pinterest (Opens in new window)
  • More
  • Click to share on LinkedIn (Opens in new window)
  • Click to share on Tumblr (Opens in new window)
  • Click to share on Pocket (Opens in new window)
  • Click to share on Reddit (Opens in new window)
  • Click to email this to a friend (Opens in new window)
  • Click to print (Opens in new window)

7 Comments · Labels: How To, Makeup & Beauty Tagged: beauty products, how to, makeup, makeup monday, organization, storage

March 27, 2015

Easy lamp DIY makeover in five steps

March 27, 2015

In case you haven’t heard, I’ve been doing a lot of cleaning.  Most of that means taking things that are no longer working and getting rid of them.  But I have a bad disease of saying, “I can make something with this!” and hanging on to things for ages.

For example: I thought I was going to do some awesome project with empty beer and wine bottles.  So I started to save them.  Now it’s a habit and I’m like, “Woo, I have a six pack….of empty bottles…”  Maybe I can sell them on Etsy to people with more follow-through.

Anyway, when I saw these lamps, I saw DIY project written all over them.  For $10, I have all new lamps.  How did I do it?  Simple: spray paint.  Next to Mod Podge, it’s my favorite craft supply.

Super simple lamp makeover using spray paint. New lamps in under an hour for about $10!

Let me tell you how I took these lamps from beat up and dated to shiny and new.

Step 1: Decide you can make something out of this.

Spray paint is my friend.  I love spray paint.  I took a can of spray paint to old, beat down chairs and they now look decent enough to be used in my dining room.  But that’s beside the point.

Super simple lamp makeover using spray paint. New lamps in under an hour for about $10! Spray paint updates anything and it's virtually mistake-proof!

These lamps were in my Grammy’s apartment (I believe) and somehow ended up in my father’s basement.  They were used for a while and eventually replaced.  They still worked, so we didn’t get rid of them.

And they still work years later!  I’d love to redo the wiring, but that’s another DIY for another day.

Step 2: Decide what you want them to look like.

I was going for a mercury glass effect thanks to the brilliant mind of Jonathan.  I went to my second favorite craft place (JoAnn Fabrics) and found silver spray paint and spray paint that makes a webbing effect.

Dude, it comes out just like Spiderman.  I felt so cool.

Spray paint is the best thing when DIY-ing. I love Rustoleum because it covers everything and lasts for ages (or until you spray paint again)!

Spray paint is the best thing when DIYing. I love Rustoleum because it covers everything and lasts for ages (or until you spray paint again)!

Step 3: Take it to the paint!

Be sure to tape off all parts that shouldn’t get painted (wires, the top bulb receiver thingy).  I don’t care how careful you think you’ll be, you will get paint all over.  I’m a pretty good DIY-er, but my best talent is making a mess.


I did two coats of silver and a coat of the black webbing.  I’m slightly disappointed the black didn’t show up better with the webbing paint, but the ridges make it difficult to see.

I almost stopped at painting them just plain silver.  It looks so sleek, but it also kind of looks like a soup can.  I have a hodge-podge of furniture right now, but collection-center chic isn’t what I’m going for.  So I added the webbing paint on top to try to give it some texture, dimension, and those little crackles in the mercury glass.

Super simple lamp makeover using spray paint. New lamps in under an hour for about $10! Spray paint updates anything and it's virtually mistake-proof!

Super simple lamp makeover using spray paint. New lamps in under an hour for about $10! Spray paint updates anything and it's virtually mistake-proof!
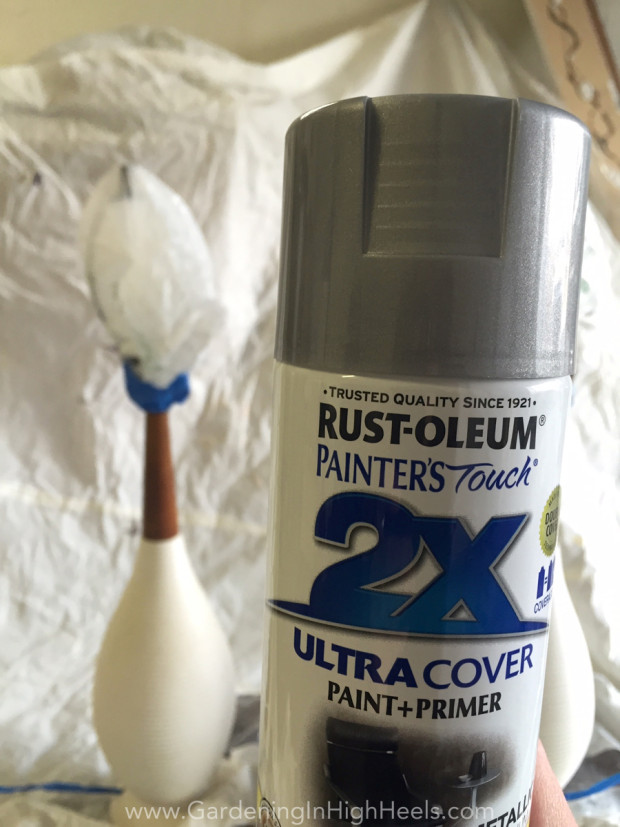
Step 4: Have painters’ remorse.

I checked Instagram and got a comment from a friend saying that she’d buy these from me if the wooden part was painted gold and the base stayed the same.  And I got painters’ remorse.  That would have looked awesome.  I was seriously upset I didn’t do that.

But then I remembered the white ceramic part is old and pretty beat up.  Instagram just made them look pretty and white.

Plus, I can always paint over them again if I want to.

Step 5: Find somewhere to put them and revel in your DIY powers.

These guys hung out in my garage for a week because I wasn’t sure if I was going to add another layer of webbing, either black or gold.  I still could.  But once you decide, Okay, that’s enough paint, now you need to figure out where to put them.

Super simple lamp makeover using spray paint. New lamps in under an hour for about $10!

The lamp shades that were also found in the basement are a little tooooo tall, but hey, they’re free.  And the lamp base itself is pretty big, so I guess it balances out.

These are going to hang out in my bedroom and my living room until I have my office in order because I originally had the intention of using them as lighting in my office.

Super simple lamp makeover using spray paint. New lamps in under an hour for about $10! Spray paint updates anything and it's virtually mistake-proof!

There you have it.  Five steps to a DIY lamp (or anything) makeover.  I cannot tell you how much I love taking something old that someone would say isn’t worth keeping and turning it into something shiny and new and pretty again.

Have you done any projects recently?  What did you DIY?

Spread the love:

  • Click to share on Twitter (Opens in new window)
  • Click to share on Facebook (Opens in new window)
  • Click to share on Google+ (Opens in new window)
  • Click to share on Pinterest (Opens in new window)
  • More
  • Click to share on LinkedIn (Opens in new window)
  • Click to share on Tumblr (Opens in new window)
  • Click to share on Pocket (Opens in new window)
  • Click to share on Reddit (Opens in new window)
  • Click to email this to a friend (Opens in new window)
  • Click to print (Opens in new window)

7 Comments · Labels: Five Things, How To Tagged: diy, home decor, home improvement, homemade, how to, lamp, makeover, projects, rustoleum, spray paint

February 20, 2015

Five things to prepare for 30 Days of Lists success

February 20, 2015

I have a shocking confession: I planned ahead.  The past two times I participated in 30 Days of Lists, I had no idea what vessel would store my magnificent lists.  In September, I pretty much stored them on Post It Notes until the end of the month when I decided to write them on Project Life cards and hold them together with binder rings.  And in December, I bound my own book again with PL cards, but I didn’t have it ready in time.

Five things to prep for 30 Days of Lists success. Get your PL cards and rukristin stamps!

So this time, I’m planning ahead.  As I mentioned before, I ordered the perfect little notebook from rukristin and I’m excited to fill it up with lists throughout March.  If you’ve never listed before, or you have but are looking for inspiration, here are five things to gather before you start listing.

A notebook / paper

If you register early for #30Lists, you will get a digital scrapbook kit.  While it’s so cute, I love the tactile element to crafting.  Cutting things out, finding the right layout, adding embellishments.  So I need a good base for my work.

Like I said, I’ve used all sorts of bases, from plain PL cards to Post Its.  Whatever you want, make sure that you have it handy when March starts so you can jump right in and start sharing your lists with the world.
30 Days of Lists prep. Notebook from American Crafts DIY Shop

Something to write with

I write my lists with Sharpie pens and my list titles/prompts with a regular Sharpie marker.  love Sharpie pens.  Any Sharpie product pretty much is steak sauce in my book, but the pens are great.  They’re bold, they glide nicely, last for ages, and super thin so you can doodle in the margins.

I like to grab a few colors that coordinate.  In September, I stuck with a black/white theme with pops of purple and pink.  So I grabbed Sharpies in various shades that would work together.

But you may want a plain black pen, colored pencils, ink and feather…whatever.

Washi tape

I’m a little late to the washi party, but I’m all in now.  Thank the lawd I have a Pat Catan’s close to me so I don’t have to fork out $5 per roll.  I’m also a fan of the Target dollar section for finding things like that.  They have (had?) surprisingly cute washi tape for a buck.  Yessir.

You can't scrapbook or makes 30 Days of Lists books without washi tape.

In December, I didn’t have to add many embellishments because of the paper, but I did add in some stamping and some washi tape elements.  In September, my lists were all embellished with washi tape.  I like the pop that washi tape gives my books without having to sacrifice writing space.

Fancy scissors

Someone help me with the proper name for these things.  I love them for adding a pretty boarder around my scrapbook pages or cutting washi tape instead of tearing it for a more elegant feel.

Other stuff

Embellish away!  Ribbons, decorative tape, stickers, stamps, patterned paper…these are your memories and your book, so make it how you want it to look.

Studio Calico and American Crafts DIY Shop scrapbook embellishments from rukristin papercrafts

Arrow rubber stamp from rukristin papercrafts

I can’t wait to start the March 30 Days of Lists and for once, I will be ready for it!  Are you going to join the the list making?

What essentials do you have on hand for scrapbooking?

[disclaim]The link to register for 30 Days of Lists is an affiliate link.  I’ve been listing with them in 2014 and I know you’ll love it too.  Thank you for supporting gals that support Gardening in High Heels![/disclaim]

Spread the love:

  • Click to share on Twitter (Opens in new window)
  • Click to share on Facebook (Opens in new window)
  • Click to share on Google+ (Opens in new window)
  • Click to share on Pinterest (Opens in new window)
  • More
  • Click to share on LinkedIn (Opens in new window)
  • Click to share on Tumblr (Opens in new window)
  • Click to share on Pocket (Opens in new window)
  • Click to share on Reddit (Opens in new window)
  • Click to email this to a friend (Opens in new window)
  • Click to print (Opens in new window)

Leave a Comment · Labels: Five Things, How To Tagged: 30 days of lists, crafts, lists, projects, scrapbooking

  • Newer Entries
  • 1
  • 2
  • 3
  • Previous Entries

Who’s Angelica?

Life Un-styled Blogger, Gardener, Shoe Lover..among other things

I'm here to encourage and empower you to grow where you're planted and embrace the weeds that sometimes pop up. I'll share inspiration, products I like (and you may too), and stories from the garden.

Gardening In High Heels is for badass babes who aren’t afraid to get a little messy. Want to learn more? Start here.
           

Dig Up Something Good

Cultivate a beautiful life with emails directly from me!

Latergrams

Tweet, Tweet

My Tweets

Other Flowers in the Garden

Sunday Lately with Blogger Tribe
#BeABetterBlogger

Disclosure Policy

Just so we can keep everything cool, I wanted to share a few notes on how my blog operates.

I occasionally receive products and/or payment from companies to review and/or give away. Sponsored posts and giveaways will be noted as such.

All images and content are property of myself and Gardening in High Heels unless otherwise stated. You may not use my images or content without express written permission.

See the full policy here.

Dig Up Something Good

Let’s Play


People Really Dug These

  • Good for her, not for me.

We Belong in the Garden Together

Theme by 17th Avenue · Powered by WordPress & Genesis

loading Cancel
Post was not sent - check your email addresses!
Email check failed, please try again
Sorry, your blog cannot share posts by email.